
Laser Kerf Compensation for Finger Joints & Living Hinges (2026)
Finger joints that fit right the first time start with measuring your actual kerf – typically 0.08 to 0.30mm depending on your laser, material batch, and cut direction – then offsetting your CAD geometry or using software compensation to dial it in. This article walks you through testing for kerf, applying offsets in LightBurn, and tuning living hinge slot spacing so your plywood joinery comes out tight enough to hold square without forcing assembly.
By Mike Dolan ·
Quick Answer: Laser kerf compensation for finger joints requires a burn test to measure actual kerf (divide total material loss by 2), then offset CAD by half that value or use software compensation in LightBurn; living hinges need slot spacing tuned to material thickness and kerf so they bend without cracking.
| Material | Engraving Contrast | Cut Ease | Smoke / Odor | Cost | Beginner Score |
|---|---|---|---|---|---|
| Basswood (3 mm) | ★★★★★ | Excellent – 1 pass | Low | $ | ★★★★★ |
| Baltic Birch Plywood | ★★★★ | Good – 2-3 passes | Medium | $$ | ★★★★ |
| MDF | ★★★ | Good – 1-2 passes | High (formaldehyde) | $ | ★★ |
| Pine / Soft Plywood | ★★★ | Poor – resin deposits | Medium-High | $ | ★★ |
Why Basswood Is the Best Wood for Laser Kerf Testing and Joinery
Basswood is the go-to for kerf testing because it behaves the same way every time. Low resin content means your beam isn’t fighting through sticky deposits, and the pale, consistent grain gives you a clean reference surface – you can actually see where the kerf starts and ends. That matters when you’re measuring to the tenth of a millimeter.
If you’re dialing in basswood laser cutting settings for joinery work, starting with void-free laser-grade sheets is non-negotiable. A hidden void under a finger joint slot changes the kerf mid-cut. Your test piece won’t match your production run, and you’ll spend an afternoon wondering what went wrong. I’ve been there.
- Low resin content – According to USDA Forest Products Laboratory data on basswood density, basswood ranks among the lowest-resin domestic hardwoods, which means minimal char buildup on your lens and cleaner kerf edges on every pass.
- Consistent density – the same settings work batch after batch without retuning; your 0.15mm kerf number from Monday still holds on Friday.
- Void-free grade – no internal gaps to interrupt the beam, so kerf width stays predictable across the full length of a finger joint slot.
- Predictable kerf across cut directions – grain direction has minimal effect on kerf width, unlike denser hardwoods where you’ll see measurable variation between rip and crosscut paths.
- No toxic fumes – unlike MDF or treated plywood, basswood is safe for indoor use with basic ventilation, which matters when you’re running repeat burn tests. If you want to go further and prevent charring when laser cutting, air assist plus basswood’s low resin content is the combination that actually works.
How to Measure Your Laser Kerf: The Burn Test Method
All settings below are for Crafteker 3mm basswood sheets (12×12 inch, laser-grade). Use the Laser Settings Calculator to fine-tune for your specific unit if results differ.
| Machine | Cut Speed | Cut Power | Passes | Engrave Speed | Engrave Power | Air Assist |
|---|---|---|---|---|---|---|
| 5W Diode | 3-5 mm/s | 100% | 2-3 | 60-80 mm/s | 35-40% | Recommended |
| 10W Diode | 6-8 mm/s | 100% | 1-2 | 80-150 mm/s | 40-50% | Recommended |
| 20W Diode | 8-12 mm/s | 100% | 1-2 | 150-300 mm/s | 40-60% | Recommended |
| 40W Diode | 10-15 mm/s | 100% | 1-2 | 200-400 mm/s | 45-65% | Recommended |
| 40W CO2 | 20-35 mm/s | 65-75% | 1 | 200-400 mm/s | 45-65% | Required |
| 60W CO2 | 30-50 mm/s | 55-65% | 1 | 200-400 mm/s | 40-55% | Required |
Note: Air assist is strongly recommended for diode lasers and required for CO2 machines. It clears smoke from the cut path – without it, residue clouds the beam mid-pass and your kerf widens unpredictably, which defeats the whole point of measuring it precisely. Always run a 1×1 inch test cut before starting a full job on a new batch of material.
Your burn test square needs to be cut at the same focus distance and air assist settings you’ll use in production. Change either variable and your kerf number changes too. One test, one configuration – then document it and don’t drift.
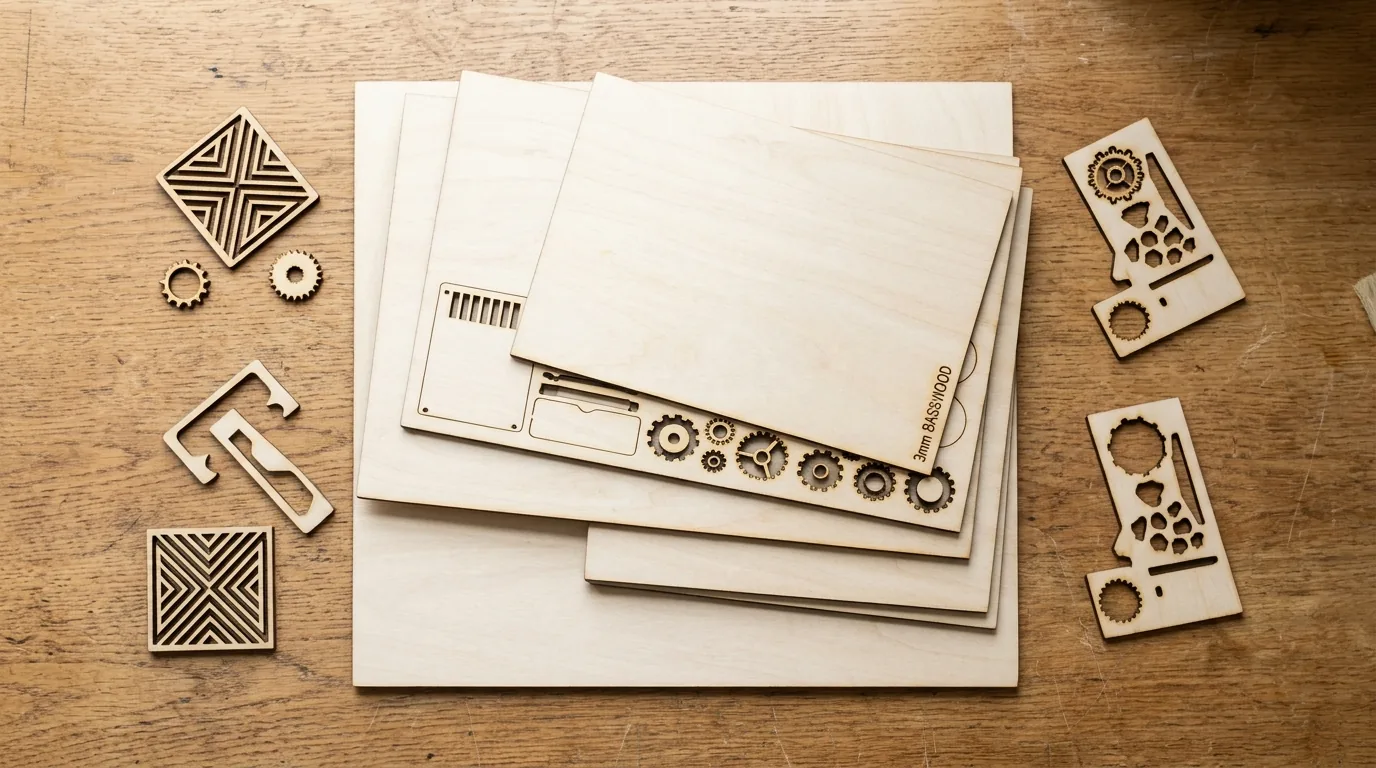
The Crafteker 12-pack basswood sheets are purpose-built for kerf testing and joinery work – 12×12 inch, 3mm, laser-grade, void-free. $24.99 for 12 sheets ($2.08/sheet). Enough sheets to test a full tolerance fence array without feeling guilty about it.
Applying Kerf Compensation in LightBurn and CAD: Two Workflows
Kerf compensation means adjusting your cut geometry so the laser removes material in exactly the right place – not guessing. You have two options: let LightBurn handle the math, or do it yourself in CAD. Both work. Pick one and stick to it.
Follow these steps for reliable, press-fit results every time:
- Cut your burn test square. Design a 20mm × 20mm square in LightBurn or your CAD software. Cut it at your actual production settings – same focus, same air assist, same speed and power you plan to use on the real job. No shortcuts here.
- Measure with calipers.
How Does Kerf Compensation Compare Across Diode, CO2, and Fiber Lasers?
Kerf width depends heavily on beam profile and focal length – and the differences between laser types are big enough to matter for joinery. CO2 lasers on 3mm plywood typically land in the 0.10-0.25mm range. Diode lasers run wider, 0.15-0.35mm, because their beam profile is less focused at the material surface.
Fiber lasers sit at the tight end: 0.05-0.15mm, thanks to a narrower beam diameter and shorter focal length. That sounds great until you realize even a 0.05mm shift in kerf still throws off a press-fit joint. For Etsy sellers cutting batch finger-joint boxes, CO2 gives the best balance of speed and consistent kerf – but whatever you’re running, document your kerf per machine, per material, per thickness. It’s not universal.
Why Your Finger Joints Come Out Loose or Stuck – and How to Fix It
Light brown edges are normal. Joints that need a mallet or fall apart with a nudge aren’t – here’s what’s actually going wrong.
Most fit problems on laser-cut finger joints trace back to these four issues:
- Kerf measured wrong – or not at all: This is the big one. I trusted a generic kerf value from a forum and wasted 3 sheets before I finally cut a test square and measured. My actual kerf was 0.18mm; I’d been compensating for 0.10mm. Run your own basswood laser cutting settings burn test every time you switch machines or material batches.
- Plywood batch changed: Glue line density and ply thickness vary between manufacturer runs. A new pack of sheets – even the same brand – can shift your kerf by 0.05mm or more. Re-test before you cut a full project.
- Focus distance off: Even 2-3mm of focus drift changes kerf by roughly 0.05mm. Re-check your Z-offset whenever you swap material thickness, and don’t skip this step after moving the machine.
- Air assist inconsistent: Without active airflow, smoke re-deposits in the kerf and scatters the beam. If your test cut had air assist running but your production run didn’t, your effective kerf is different – and so is your joint fit. To prevent charring when laser cutting, keep air assist consistent between test and production.
Loose joints are easier to rescue than stuck ones – a dab of wood glue and clamps handles most gaps. For joints that won’t close, light sanding on the finger faces (not the slot walls) removes material evenly without blowing your tolerance completely.
Best Basswood Sheets for Laser Kerf and Joinery Precision
Crafteker 3mm basswood sheets are built for exactly this kind of work – 12×12 inch, laser-grade, void-free, and consistent enough that your kerf numbers actually stick between batches. At $24.99 for 12 sheets ($2.08/sheet), buying in bulk means you can run burn tests without cringing every time you sacrifice a sheet.
Void-free grade matters here specifically: internal voids shift local density, which shifts kerf mid-cut. Consistent wood gives you consistent numbers. The settings in this guide were tested on this material – which means less re-tuning on your end.
Ready to cut? Get the wood that works with these settings:
→ Buy Crafteker 12-Pack Basswood Sheets on Amazon – $24.99
Clip the 7% coupon on the listing page – buy 2 packs and save 20% automatically.
Also available: 5-pack ($15.97) · 3-pack ($12.99)Frequently Asked Questions
What is laser kerf and why does it matter for finger joints?
Laser kerf is the width of material vaporized by the laser beam – typically 0.08 to 0.30mm for plywood depending on machine, lens, and material. It matters for finger joints because if you design a 20mm slot but the laser removes an extra 0.15mm total (0.075mm on each side), your fingers come out 0.15mm wider than intended, making assembly tight or impossible. Measure your actual kerf with a burn test, then offset your CAD by half that value.
How do I calculate kerf compensation for a finger joint?
Cut a 20mm test square, measure the result with calipers. If it measures 19.85mm, your total kerf is 0.15mm. Divide by 2 to get 0.075mm per side. In LightBurn, set kerf to 0.15mm and let the software offset automatically, or manually redraw slots 0.075mm narrower and fingers 0.075mm wider in CAD. Test before cutting your full project.
Why does kerf vary between my plywood sheets?
Kerf changes with ply thickness (0.30mm typical for 3mm, 0.25mm for 6mm), glue line density, grain direction, and even laser focus drift. A new plywood batch can have slightly different internal density. Always run a burn test with material from the batch you’re using for production – do not reuse kerf values from previous projects without re-testing.
What kerf offset should I use for living hinges in 3mm basswood?
Living hinges need kerfing to introduce flexibility, so intentional slot spacing matters more than press-fit precision. Space slots 2-3mm apart for 3mm basswood, starting at that ratio. If hinges crack, widen slots by 0.1-0.2mm. If they won’t bend, narrow slots by 0.1mm and re-test. Document the exact slot width and spacing that works for your machine and material batch.
Where can I buy high-quality basswood for laser kerf testing?
Crafteker on Amazon: 3-pack $12.99, 5-pack $15.97, 12-pack $24.99 ($2.08/sheet, best value for multiple burn tests). All sheets are 3mm laser-grade, void-free, and 12×12 inch – ideal for test squares and joinery projects. Clip the 7% coupon on the listing page.
About the author: Mike Dolan is a laser maker and wood materials specialist with 8+ years cutting basswood, birch, and MDF on diode and CO₂ machines. He tests every Crafteker basswood batch before listing.
Finally someone explained this clearly. I was cutting finger joints blind until I measured a burn test square – turned out my kerf was 0.18mm and I’d been designing with 0.1mm offset. Cut a new test box with the right math and it went together in one go, no forcing. Grabbed Crafteker basswood for all my test cuts since it’s void-free and the consistency means my kerf numbers actually stick between batches.